Monday, December 31, 2012

Christmas!

Once upon a time...  
There was a place called "Christmas."

Cody and I decided to go there. 
We found ourselves a Snow Beast, (on loan),

Strapped on some snowshoes, and headed out to find Christmas.  

 
We found it!  And some friends.  

We played hockey on a frozen pond- and even though it was very cold, we stayed toasty warm.  
Cody and I even won the hockey game.  

We were rewarded with gifts and buffalo steak. 
The End.
Thank you Gramma Jane for the most amazing sweater! 


MADNESS

Using lots of clamps and as much pressure as I could physically manage, I glued the knee together!


The end grain of my knee, 12 1/8" laminations.

Here it is holding up the table, the knee is more than strong enough, but the table flexes a little.

Beth wanted a table that opened up so she can store trinkets and other stuff.  This requirement ended up working great, it gave the table enough strength to cantilever the whole way and not sag.  I recessed the hinges and then veneered over them, so you can't really see them at all.

The companion way ladder, the sides are VG fir and the treads are some of the salvaged Teak from the Tartan we ransacked.


Beth gluing in the vent line for one of the water tanks.

Monday, December 17, 2012

Back to/from work?


I have been busy working on a climbing wall in Park City lately and have had to put the boat aside.  However the wall turned out pretty cool.  The wall is in a condo that sits on a little pond,  I'm guessing the condo is about 700 sq. ft. and the climbing wall is 170 sq ft.   Pretty committing, but I think that means he will actually put the wall to use.


 This wall was a little different than most I build  in that it is wood framed.  Wood sounds much easier to work with but I find it more difficult for climbing walls.  The problem is all the connection points, steel is just like gluing everything together, the possibilities are endless.  Wood on the other hand has two issues of wood grain and splitting.  Wood makes a lot of sense when things are square, but climbing walls are not sqare.

I did almost break a 2X6 in a way I never have before.  In order to get the sheeting to lay flat to the framing the studs have to be twisted the match the twist of the wall.  Usually I'm twisting angle iron (L shape) which is easy, but a fir 2x6 doesn't like to be twisted.  Anyway I stopped twisting it after I heard a pretty good crack, and it didn't break in half.


Check out this contraption .  I was trying to bend some mahogany trim into place and the piece broke in half, so Beth and I rigged up this steam box.  We used a camp stove and a pressure cooker for the steam.  Then I found some scrap copper pipe and a length of PVC pipe.  The trim piece goes in the tube, and we just used some old rags to block off the ends.  Turns out pressure cookers are less frightening when steaming wood than when steaming vegetables.

We steamed it for about 25 minutes and it bent into position no problem.  I forgot to take a picture, but I think the steamer was cooler than the finished product.


While I was working on the wall Beth glued together our sewage holding tank.  Which serves as part of the floor under the dinette.  Again no photo, next post.

I thought this ended up looking pretty cool.  Its the a leveling pad to mount the toilet to the hull.


I just started this madness today, 1/8 inch strips of wood  bent to a pretty tight radius, which will make really cool looking braces to hold up the table.  I'm going to try and make the table without any center or end support, so it will just be sticking out of the side of the boat.  If its possible it will look awesome, but I have my doubts as to whether it will be strong enough.

Back to work, but I guess it just depends on your definition of work.

Thursday, December 6, 2012

We're puttin' tops on stuff!


This week on the boat, the icebox continues.....

We poured the outside insulation last week, and this week we are working on the lid.  The idea was to pour foam into the area where the lid would go, then pull the hardened foam block out and fiberglass the outside.  This should yield a lightweight and snug fitting lid.

I put a piece of plywood covered in plastic about three inches into the box to pour the foam onto.  Of course you can see the foam grew well out of its mold, which is good.  I cut around the edges and then Beth helped me pull it out using those three chisels.


There were a few voids, but it turned out pretty good overall.  


We rarely work on just one thing at the shop and this week has been no different.  I put some time into getting the port side deck framing in.  Beth and I glued the carlins(beam running from bow to stern) a month or more ago, so all I had to do was cut some notches and glue it in.  The trick with the carlin is getting it to run at at the same angle as the side of the boat.  It was sawn to shape, but as with most things needed to be tweaked a little.  I this photo we have laid pieces of wood across and then we just look down them to see if everything is flowing smoothly.  Then we used a clamp to raise and lower the carlin until it looked good.   

  
Here is the finished product.  We decided to go with pretty wide side decks, 18".  Our previous boat had much narrower side decks and it can be a pain to go back and forth carrying sails.  Of course on the flip side we lose some interior room.


Notch in the carlin where a side deck beam will go.


Beth, as you can see in this picture, has been on a sanding/painting tear.  Most of the interior has at least one coat of paint and some are finished.  It all looks so great with paint.


I caught Beth bashing the lid to her paint can on with the roller handle.


Freshly painted walls and Icebox.  We had just enough copper to finish the icebox top, It looks so sick!

I have been working for the man lately, so haven't been at the shop as much as I would like, but when I get this monkey off my back I'm going to start working on the Head(bathroom)(nautical terms suck).  Our toilet just arrived yesterday and now I have to find a way to fit it in the small space designated for it.  We'll see.

Tuesday, November 27, 2012

Turn up the Volume


The last two weeks have been great.  For the first time ever, Beth and I got to see both our families for Thanksgiving.  The Harris family assembled the weekend before Thanksgiving in Salt Lake.  My sister Afton instigated the whole thing and everyone was able to make it. 

We had some snow in the valley a while back and I had to get a picture of this wave sliding off the back of some broken down car near the shop.


The family was eager to see/work on the boat, so here we all are.   I'm trying to figure out what to have everyone do.

Beth continuing the endless job of sanding.

Afton was here in SLC for longer than the rest of the family and helped out a lot on the boat. She finished all the varnish work on the drawers/doors,  They look awesome.  Thanks, Afton!

This was our sample of the 2 part polyurithane foam that I bought to insulate our ice box.  Dylan mixed  the minimum amount that the cup could measure(maybe 4 oz.) and it turned into this giant mushroom.  

The product says that it will grow at a rate of 20:1.  We found it to be growing a little more than that, which meant that the two gallon kit that I bought would create 50+ gallons of insulating foam.  We thought for sure I had bought too much.  I mean you look at the cavity that needs to be filled and it just doesn't look that big.

This became one of those times when you just can't believe your calculations.  Here is how it goes.  Dylan calculated the volume of the space the icebox would fit into at around 20 cubic ft.  Which seemed high, but not too bad right?  Then he determined that the volume of the icebox was around 7 cubic ft.  So the area that needed to be filled was around 13 cubic feet, which still sounds reasonable.  All we had to do now is convert 13 cubic ft. into gallons and we would know how much foam to use.  

Now seriously take a guess at how many gallons fit into a cubic foot.  A 1' by 1' by 1' box.  Don't look down, really think about it.  We thought that it was pobably 2-3.........


Ice box, I hope I don't regret the shape of the opening.

Still need more foam
When I was figuring out my water tank capacity I found that it takes  7.48 gallons to fill a cubic ft, which at the time I convinced myself was true.  But now I looked at the seemingly small area that would be filled with foam and couldn't believe that it would take upwards of 100 gallons to fill.  After measuring five gallon buckets and other trusted containers we accepted that it was true and we didn't have nearly enough foam.  
We poured what foam we had and it ended up filling up about 60% of the cavity.  The numbers don't lie!  The foam had such lifting force that the it took three of us to hold the icebox from floating out of the space.  


Good times down at the shop.  

Saturday, November 10, 2012

Upgrade-itis

We started off with good, or should I say different intentions than what is now happening on the boat.  People often tell you that the interior, particularly the finish work takes a huge portion of total boat time.    Of course our response to this was to say that we would simplify the interior joinery and just have painted drawer fronts and formica countertops.  Well it hasn't worked out that way....
This is where it started, instead of simple painted drawer fronts we decided to do VG Fir trimmed with mahogany with a stripe of Fir.  This as you can imagine is a considerable upgrade in appearance and labor.

Beth has been doing a great job varnishing all the drawer fronts.


Upgrade-itis is now in full effect, its just so easy to say "we have worked so hard on the rest of the boat and it isn't that much more money/labor".  But it is! And we can't stop.  Its a snow ball effect.  Anyway here is the latest, copper coutertops, above I'm glueing the countertop to the sheet of copper.

And here is the finished product.  I bent the copper up for a seamless backsplash and added striped mahogany rails around the edges.  Another upgrade was to under mount the sink.  Where will it end?

Beth and I caught one of the last sunny fall days and went on a short hike up Little Cottonwood.  This is the Lisa falls area the creek forms multiple waterfalls and pools down the narrow canyon.


Ok, this is not an upgrade, this was planned all along so maybe we are slowing down.  This is going to be our icebox (built in cooler). I am using the same "stitch and glue" techniques that beth used to build her dinghy.  

After I got it all stitched together i hung it in the same fashion that it will hang in the boat and put thickened epoxy fillets on all the seams.


By using copper wire I don't have to remove the wires after the glue dries, as copper won't rust and become a mess.


In the end we are happy with the upgrades we have decided to go with.  Its just so much more fun to build something that you really think looks good.  We figure if you can't have a lot of counter space or drawers you might as well make the ones you've got really nice.

Wednesday, October 31, 2012

Interiors and Visitors

It's been a fun and productive few weeks down at the boat shop.  Cody has been cranking out the interior;  the galley is nearing completion, the aft cabin is pretty much done...  His progress is very visible, which is fun!  It's crazy to look back and see how far we've come in such a short time.  

Kitchen drawer assembly line!  Simple, strong construction.  These drawers are now assembled and faced with Vertical Grain fir, with Mahogany and fir trim.  I've been working on sanding and varnishing the faces lately.  I think I should be able to finish them this afternoon.   

This is our aft cabin.  In this photo, it's just framed in.  

Here is the aft cabin again, with the floor/bed platform glued in.  It's big enough for two to sleep in, and sits just  below the cockpit.  We had originally planned to run the cabin along the side of the hull, so that you would sleep with your head pointing toward the bow, and feet at the stern.  We started mocking that design up, and there just wasn't enough room for it to be practical- it would have been like sleeping in a coffin.  So we rotated the bed 90 degrees, so now you'll sleep athwartships- head on the starboard side, feet on the port.  This will be our "guest room,"  and I hope we'll have lots of chances to use it!   

There's lots of space beneath the aft cabin, and we have to take advantage of every inch.  You can see we've cut several access hatches in the floor of the aft cabin.  
  

My Mom and Dad came out for a visit to Salt Lake, while on their "Offspring Tour 2012."  My mom coined the name of the tour.  I'm pretty sure she has no idea who 
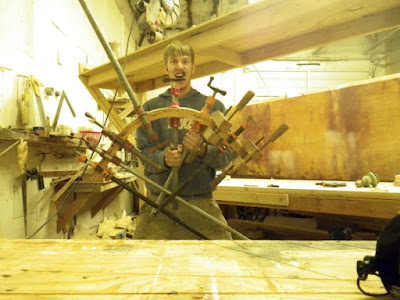
The Offspring are.  They went to Chicago to visit my youngest sister, Grace,  then to Asheville to see Amy.    I think they're really enjoying their empty nest!  While they were here, my Dad built us our first cabin-top deck beam!   

We had a great time with my folks- I'm so grateful that we all get along so well!  Unfortunately, the weather was some of the worst of the year- rain and snow, but we managed to snag a sunny window to take a drive up Little Cottonwood Canyon.  We walked to a waterfall, and drove up to the ski resorts- I hope we inspired a ski trip out here this winter!  Alta and Snowbird were just receiving their first snow of the season, and I saw the look my Dad had in his eye.....   

We also had a great, GREAT meal at Forage.  If you are looking for the best dining experience in the state of Utah- perhaps the whole mountain west, go there.  I mean it.  

Remember scarf joints?  We're at it again, gluing up the cockpit floor.  

Cody's getting so creative with his clamping techniques.  In this photo, we're looking at the floor of the foot well in the cockpit- that piece of plywood that's been scarfed together.  
To reinforce this structure, we've glued wood fillets along the corners. 
 Now, the white cross pieces in this photo are resting not on the floor of the cockpit, but only on their ends, on those wood fillets- the pressure from those lead bricks is pressing outward, not down!  
Pretty clever,  Mr. Harris, pretty clever.  


The Galley has probably been the most exciting progress we've made lately.  You can see where all those drawers are going to go.  Cody is attaching the under-mount sink, while I am supposed to be handing him his drill, screws and screwdriver.  Instead I'm taking photos of him and laughing at this ridiculous position he's gotten himself into.    


 Once that sink was mounted beneath the counter top, Cody routed the holes out on top.  

Look at that!  I have a nearly complete galley- with an awesome, deep double sink!  
Sorry I laughed at you, honey. 


Cody had some paying work yesterday, so I did some sanding, then took advantage of a dust-free shop to get some painting done.  Here's the sea-berth/couch, painted and looking pretty!  

Happy Halloween everyone!